Creating Low-Fidelity Prototypes and User Storyboards
Low-fidelity prototypes and user storyboards examples
Introduction
Once you have defined the problem identified and generated ideas for potential solutions within your project, it is well worth sketching out these ideas as early as possible in your design process. This enables to you validate your ideas and gather feedback from your stakeholders and users.
Low-fidelity (low-fi) prototyping and storyboarding with AI and PowerPoint allows you to start sketching out ideas, without the need for design or drawing skills. The key point is not spending too much time and effort to sketch out your ideas at this stage, but rather to create visuals that are good enough to articulate your ideas and enable you to gather feedback.
If you are working in the Program and Project Delivery Group (PPDG), the best timing to run the workshop is when your project is in the steps below;
- Definition – Business Analysis/ Gather& Analyse Requirement
- Definition – Quality Assurance / Design Assurance
What is low-fidelity prototyping?
Low-fi prototyping means creating simple, rough versions of your ideas. Think of it as sketching out your thoughts on paper or using basic shapes in PowerPoint. The goal isn’t to make something perfect, but to get your ideas across quickly and clearly.
Why use low-fi prototypes?
- They’re fast and cheap to make.
- You can easily change them as you get feedback.
- They help you focus on the big picture, not the details.
What is storyboarding?
Storyboarding is a way to tell the story of how a user interacts with your product or service. It’s like making a comic strip that shows each step a user takes, what they see, and how they feel.
Why storyboard?
- It helps you see your design from the user’s point of view.
- It makes it easier to spot problems or missing steps.
- It’s an engaging way to share your ideas with teammates and stakeholders.
When to use storyboards in the design process?
Storyboards are useful in an early stage of delivery in the design process. Once you have conceived your solution, you need to test if the concept solves the problem. This approach allows you to make your idea tangible idea and test it quickly and cheaply, allowing you to iterate in this way until you and your team are happy to commit to a solution.
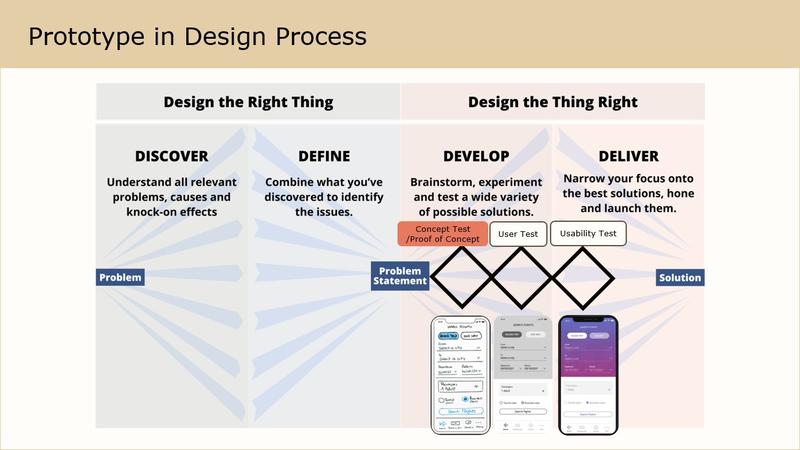
The prototype screenshot contained in this image are from Justmind’s blog “Low vs high-fidelity prototypes: a complete breakdown”
What you need to visualise and validate
With low-fi prototyping and user story boarding, you need to test your hypothesis against these two questions and express it in a story telling manner.
- What is the core value of your idea? Create a user story to express the value.
- What is your research question in the concept test? Usually, it would be "Is this idea helpful for the users?"
Step-by-step: creating low-fi prototypes and storyboards
Step 1: start with a pen and paper
Don’t worry about complex tools. Grab a pen and paper and sketch your ideas. This helps you think freely and quickly.

Step 2: define your scenario
Think about a real situation your users face. For example: “A student wants to borrow books from the library.”
Step 3: create a user story
Write a short story about what the user wants to do and why. Example: “It takes a long time to find all the books on the reading list. What if students could borrow all the books with just a few clicks?”
Step 4: draw the steps
Write down each step the user takes in a few words. If you are comfortable with drawing, sketch out the scenario with stick figures or simple shapes. Focus on addressing the core value of the idea and the research question. Don’t worry about making it pretty.
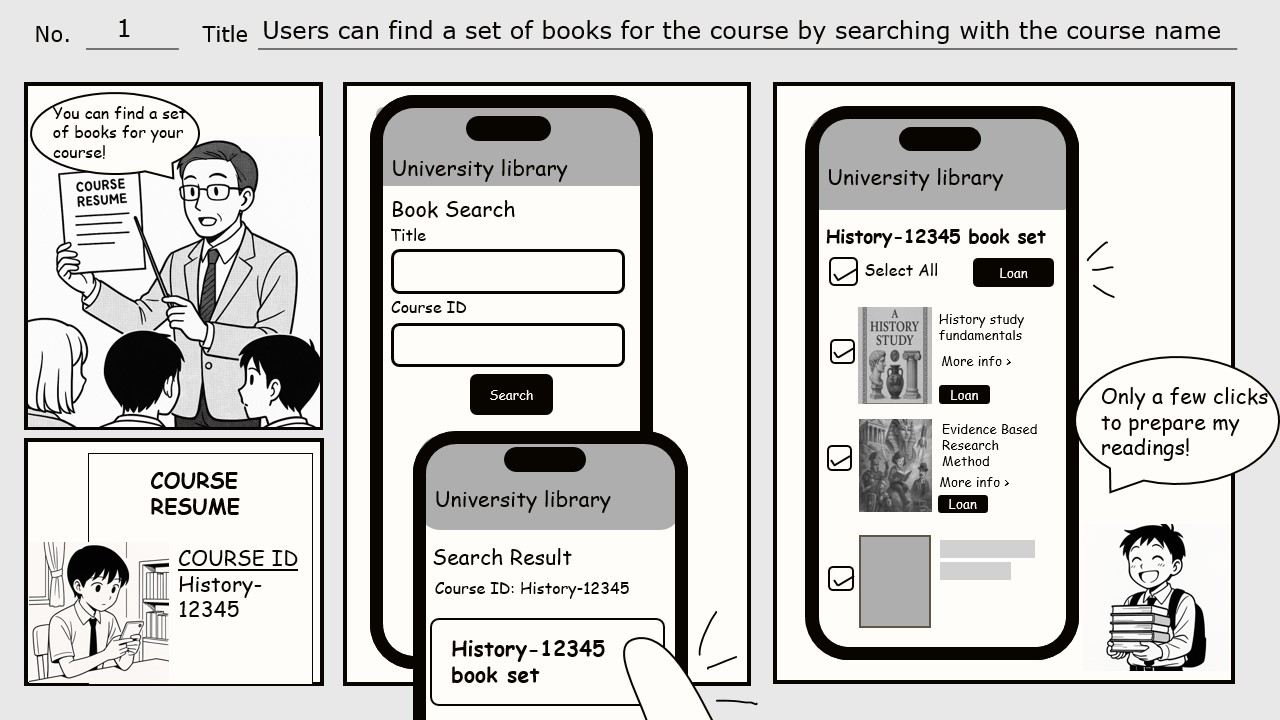
If you are not comfortable with drawing, ask AI to make a simple comic for your scenario.
Prompt Example: Can you create a simple manga in which a university professor is giving a course resume to students?
AI generated simple comic examples
Prompt: Can you create a simple manga in which a university professor is giving a course resume to students?

Prompt: Can you create a simple manga drawing in black and white in which a female university student is researching about lung cancer?

Step 5: make a low-fidelity prototype with PowerPoint
Use the simple UI parts on PowerPoint to create a rough visual for your website and App. Focus on addressing the core value of the idea and the research question. Don’t worry about making it pretty.

Tips for effective low-fi prototyping
- Keep it simple and black & white.
- Use Comic Sans for a friendly, comic look.
- Use the same line thickness for consistency.
- Don’t draw unnecessary details—focus on your idea.
- Sketch first, then digitise if needed.
Conclusion
Visualising your ideas with low-fi prototypes and storyboards makes design accessible to everyone. It’s about sharing, testing, and improving—not about being perfect. Give it a try in your next project and see how much easier it is to communicate and collaborate!
If you would like further support or are interested in joining a future workshop, please contact the UX Centre of Excellence.
Materials
UI Design parts for Low Fidelity prototyping (powerpoint file)
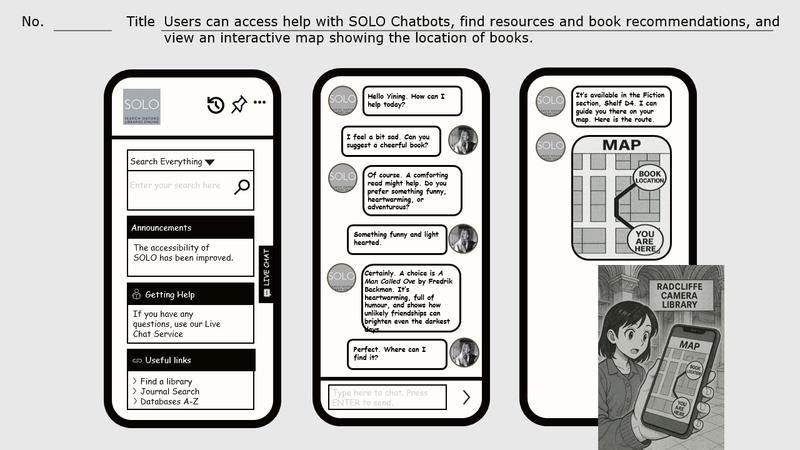
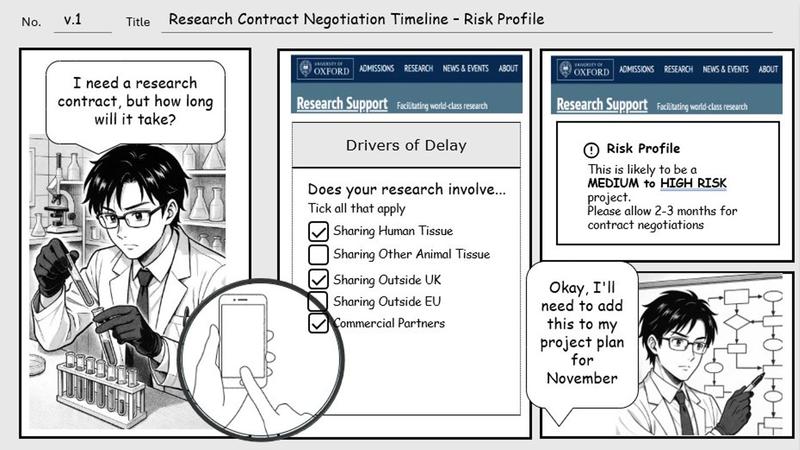
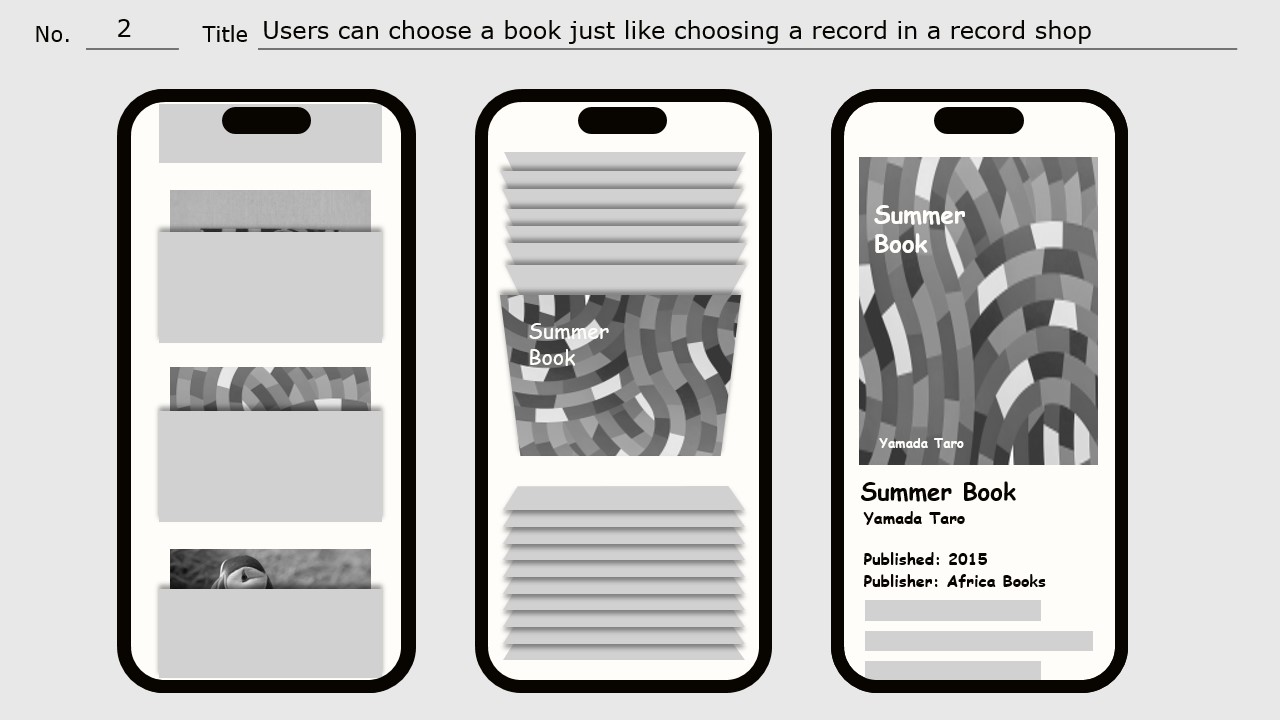
Examples of Low-fidelity prototypes and user storyboards made by workshop participants